Monday, April 11, 2022
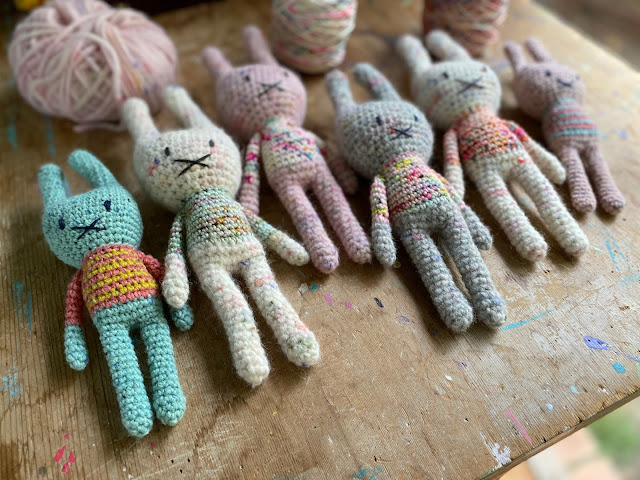
Crochet bunny time!
Thursday, February 17, 2022
Little Woollie Adventures #1 ( A video where we cut our knitting. Steeking fun for all!)
Hello everyone! Just popping in here quickly to share this little video that we made at the shop last week. Mel and Louisa who work with me at Little Woollie Makes, recently both knitted beautiful cardigans, the pattern is called Otra Cardigan by Skeindeer Knits. we thought it would be fun to share the steeking process, as cutting our knits can seem very daunting! Steeking is a common way to create a cardigan when you are doing colour work knitting. It means that you can knit your cardigan on circular needles, all in the one direction (so no purl rows and going backwards and forwards like on straight needles) and you create a steeking seam that you can reinforce and cut once your garment is finished. Mel and Louisa also chat a bit about there yarn choices and knitting journey.
I hope you enjoy this video, it was fun to make!
Here is a link to the video on our YouTube channel if you'd like to see what else we have been up to. I am trying to make more videos, so even though there is not a lot there at the moment, there will be more coming!
Monday, January 31, 2022
First sock of the year
Hi there! I hope everyone has had a good week, it's been super hot and muggy here, not like our normal dry heat in summer, the humidity really takes it out of you!
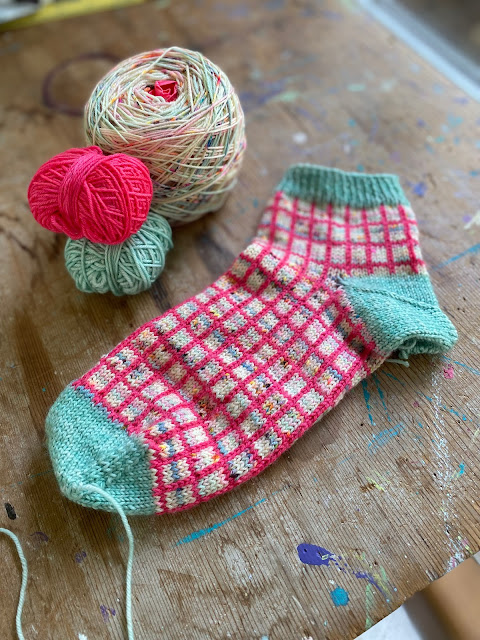
I have mostly been working on small projects that are nice and portable, like the super cute Little Boxes Socks by Summer Lee Designs. Her sock patterns are available on Ravelry and are great for colour play with colour work knitting and for using up small amounts of yarn like Advent sets and mini skeins. She has so many lovely designs, I want to make them all!
This is the first one completed, I have started the second one and hopefully I'll stay interested long enough to actually finish this pair! :) I really like the after-thought heel that Summer does in this pattern (and lots of her other ones too) it is so easy! I do get tiny holes at the corner of the heel, but I will darn them closed when I weave in the yarn tails.
I can't remember if I mentioned it in my last post, but I am joining in on a Year of Socks for 2022 too, so aiming for one pair a month. These are the January ones, I have a feeling they might drag into February before they are finished, so I'm already a bit behind. lol, I tend to plan too big and run out of steam, but this is a bit early in the year to give up completely! I have some other gorgeous colour combinations picked out, so that should keep me motivated. :) On the positive side, I have already started my second Hexie for the Persian Dreams Blanket, so I'm ahead of schedule with that one!
I have some crochet on the go too, just some spotty facewashers, I'll show you those at a later date.
(I'm finding it a challenge to get back in the swing of taking photos for posts during the day and loading them onto the computer, I think Instagram has made me slack, the quickness of posting on there is quite an addictive thing. I'll need to find some discipline to get back in the habit of planning posts and getting the right photos for them!)
Ok, better go now and get dinner ready, it's my son Jesse's birthday today. I'm feeling the time flying by, I feel too young to have a 26 year old son, but it has happened! So it's a birthday celebration tonight, maybe a nice cold glass of champagne is called for!
Talk soon! xxxxxxxxxxx
Wednesday, January 19, 2022
Year of Colour 2022
Well it has been along time between posts hasn't it! Hello out there!
Last year seemed to go by in a blur of lockdowns and Covid restrictions, I just didn't seem to find my blogging mojo at all. I'm hoping that 2022 will be different, and while we are all still living in a Covid world, maybe things will seem a little easier to manage. Although we are certainly doing our best to stay Covid safe, I really hope we can keep the shop open through the winter this year.
So what has been happening since my last post?
Little Woollie Makes Yarn Store is still here, we were able to keep trading online through the lockdowns even though the shop was closed to visitors, it kept us going and I can't thank all our wonderful customers enough for supporting our shop through the pandemic, I am so very grateful! xxxxxxx
I am an eternal optimist, and have kept on ordering more stock and sourcing lots of beautiful yarns to share with you all. It's such a problem when there are so many gorgeous yarns to tempt me, I really don't know when to stop!!
Mel is back working with me at the shop, and we have added another member to our little team, the lovely Louisa, who has mad knitting skills and is a gorgeous person as well! I feel so lucky to have such awesome people working with me at Little Woollie Makes. (it's hard to believe the shop only exists because I started this blog, it's been such a wonderful journey over the last 10 years or so!)
Which brings me to this year! We have been seeing so many gorgeous colourwork projects popping up on Ravelry and IG that we thought we might dedicate 2022 to being a Year of Colour, where we can explore some of the wonderful colourwork techniques that you can use to play with colour in knitting and crochet. Whether it is stranded colourwork, or more traditional fairisle patterns, double knitting, or intarsia work or tapestry crochet, there are lots of ways to bring more colour play into your yarny crafts.
I thought I might share things that inspire me, new patterns, or older patterns I've found that I'd like to make. If you would like to make along with us too, that would be lovely, we will be sharing our progress on Instagram and also on my Podcast ( it will make me actually record an episode!) in the newsletter, and I thought we might have a monthly Zoom get together for people who live far away, to see what other people have been making, so you can share your progress with us all that way too. You can pick to make whatever you like and we can all encourage each other through the year.
We were planning on having a monthly 'Year Of Colour' get together at the shop for any local peeps who are close enough to visit, but with the way the Covid numbers are going at the moment, we might have to wait a while to do that. Nevermind, I'm sure we can find ways to connect and inspire each other from afar.
-------------------------------------------------------------
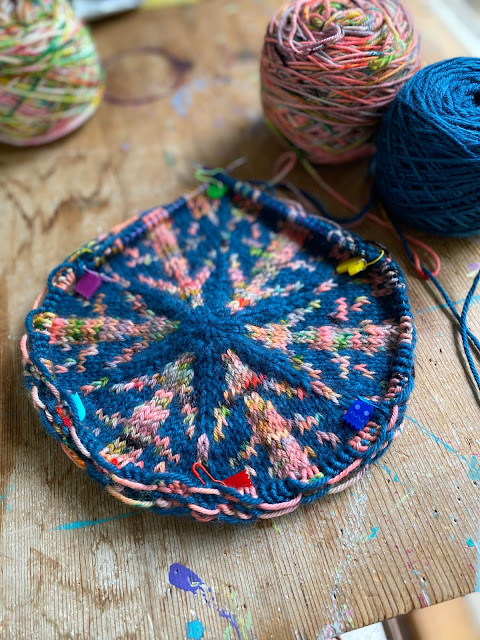
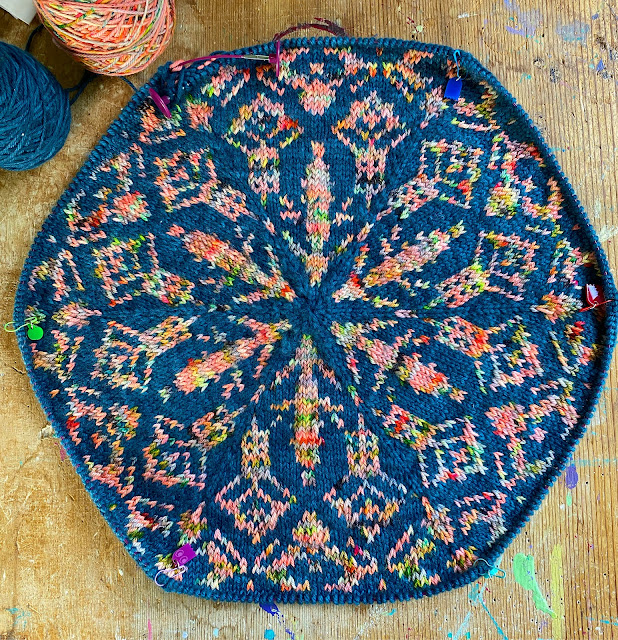
It is a large blanket made up of stranded colour work hexagons. I have just finished my first hexie, so it is going to be a slow burn project for me, I'll aim for one hexie a month I think. It is knit from the centre out. The photos show my progress from starting it on Double Pointed needles, then putting it onto a small circular and then upgrading to bigger cable lengths as the stitch count grew. It finished up on a 120cm cord! So quite a few stitches in each round at the end.
The pattern is actually made for 4ply yarn, but I have decided to do mine in 8ply with a 3.75mm needle. I am also not going to do all the different colour changes as shown in the pattern, instead I am choosing a hand dyed variegated colour as my contrast and a solid colour for my background. I am going to do each hexie a different combo of colours, so mine will have more of a patchwork feel to it I think.
This one used Great Southern Yarn 8ply in colour Brockoff's Hut for the background, and a Hedgehog Fibres DK potluck colour for the contrast.
Mel has made an amazing cushion from 2 hexies done in 12ply, it is huge and squishy, I'll pop a pick up in other post.
I think that's all I have for today, I'll let you know when the vlog/podcast is ready if you're interested.
Stay healthy and happy in these strange times we find ourselves living through!
Julie xxxxxxxxxxxxxxxxxxx
Wednesday, January 13, 2021
Crochet Eyeball Squares
Happy New Year and all that, I can't believe it's nearly the middle of January already!
2021 has started at a cracking pace with the first few weeks very busy in the shop, but I think we might have a bit of a quieter time this week, the weather has really improved and Summer is hitting with a vengeance, the beach is the place to be if you are lucky enough to still be on holidays!
I have been making some of these cute little colourful squares that I have called Eyeball Squares.
One of my favourite things about crocheting granny square type patterns is all the possibilities for colour play within each square. That's how these started, I had lots of colourful little scraps and stared making circles and adding more colours in each round, the rings of colours reminded me of an eyeball. :) Then it was a simple process to square them up, introducing a couple of more colours! I chose to use solid colours for the backgrounds to help the circle colours stand out.
In case anyone else has a scrappy stash they would like to play with, I thought I would pop the pattern on here. :)
EYEBALL SQUARE
The Eyeball Square is a quirky variation on the simple ‘circle in a square’ granny square, it is made using small amounts of different colours, so is great for a scrap busting project. I have used scraps of 4ply sock yarns for my eyeball circles and then squared them up with a plain coloured 4ply, but you could really play around with colour in these squares and do whatever you like!
Materials: 3mm hook, Small amounts of 4ply yarns, lots of colours or few,
use as many as you like!
Stitches used (UK/ Australian terminology)
Slip stitch -slst
Double crochet - dc
Half Treble - htr
Treble crochet - tr
Double treble -dtr
The starting chains of each round do not count as stitches.
Chain 4, join with slst to form a ring.
Rd1- Ch2, 12tr into ring. Finish round with a slst to 1st tr. Bind off. (12 sttches)
Rd2 - Join new colour to any stitch , Ch1, 2dc in each stitch around.
Finish round with slst to 1st dc.Bind off. (24 stitches)
Rd3 - Join new colour to any stitch, Ch2, 1tr in same stitch, *2tr in next st, 1tr in next st*
repeat * to * around circle, ending with a 2tr in the last stitch.
Finish round with a slst to 1st tr. Bind off. ( 36 stitches)
Rd 4 - Join new colour to any stitch, Ch1, 1dc in each stitch around.
Finish round with a slst to 1st dc. Bind off. (36 stitches)
Squaring up rounds
Rd 5 - Working in back loops only this round, Join background colour to any stitch
Ch 1, * 1dc in next 3 stitches, 1htr in next stitch, (1tr, 1dtr, 1tr) in next stitch, 1htr in next stitch, 1dc in next 3 stitches* repeat 3 more times around circle, join with slst to 1st dc. (44 stitches)
Rd 6 -Ch1, *1dc in next 5 stitches, 3htr in next stitch, 1dc in next 5 stitches* repeat 3 more times around circle , join with slst to 1st dc. ( 52
Rd 7 - Ch1 *1dc in next 6 stitches, (1dc,1htr, 1dc) in next stitch, 1dc in next 6 stitches* repeat 3 more times around circle, join with slst to 1st dc. Bind off.
Rd 8 - Join outline colour to any corner stitch, ch1, *2dc in corner stitch, 1dc in next 14 stitches,* repeat 3 more times around circle , join with slst to 1st dc, bind off.
Thursday, December 17, 2020
Make Some Crochet 'Fairy Lights' - Recipe/Pattern
Helllloooo!
It's been such a long time since I've posted on here, it really is time to dust off my blog and get back into it!!
I can't believe over a year has past since my last post. What a crazy 12 months it has been with bushfires and a pandemic and lockdowns and having to close the shop and working online only and then being able to reopen again, such a rollercoaster of a year!
I know a lot of other countries are still in lockdowns and suffering big time with Covid, I hope everyone is able to stay safe and well and find ways to stay busy and happy even through the lockdowns, sending positivity and strength to you all!
Life has returned to a near normal state here, our hard lockdowns over winter seems to have done the trick and things are starting to feel a little freer, fingers crossed we can keep it under control!
Anyway, it is nearly Christmas and I've been feeling quite festive recently and making some crochet 'fairy lights' with my little crochet bead recipe. I call this a recipe instead of a pattern because you really can play around with the number of stitches to make them longer or rounder depending on the shape you want.
For the 'fairy lights' I wanted a bigger bead than the ones I make for my necklaces,
so I use 8ply wool and a 4mm hook to get bead that is big enough to be seen on the Christmas tree.
(For necklace sized beads use 4ply yarn and a 2mm hook.)
These are very simple to make and are great for using up precious scraps of hand dyed speckled yarn. You can use any yarns for this I think it would be cute to use some fluffy yarns to create little fuzzy beads, or you can use plain colours or whatever you like really, if you can crochet with it you can use it!!
Crochet Bead Recipe - Basic Bead
(I am using English terminology in the pattern. )
Rounds are made in a spiral, so no joining at the end of each round
In a magic loop, make 4dc, pull magic loop tight.
OR Ch 2, 4dc in the 1st chain.
Round 2 : 2dc in each stitch ( 8 stitches in total)
Round 3: 1 dc in each stitch (8 stitches)
Continue making 1dc in each stitch, spiralling around until your bead is as long as you want.
At this point I like to stuff the tail inside the bead, or you could stuff it with scrap wool threads
Last round: Using the invisible decrease method, dc2 together x 4 to leave you with 4 stitches.
Bind off, and leave a tail long enough to thread onto a needle and weave through the bead to hide.
Variations: To make a fatter bead, start with 5dc in the magic ring and in Round 2 make 2dc in each stitch for 10 stitches in total. Continue as for the Basic Bead.
Double Crochet Invisible Decrease : insert hook into front loop of 1st stitch, insert hook in front loop of 2nd stitch, yarn over and pull up a loop, yarn over and pull through 2 loops on hook.
Making a necklace or string of Fairy Lights or a garland of beads: Once you have a collection of beads you can make them into a necklace or string of fairy lights for decorations. You can arrange them in many ways, spaced out individually, clustered in groups, colour themed, or whatever else you can think of!
I like to join my joining thread for the beads to a bead then crochet a chain and then use a few double crochets to join a bead where I want it, then make more chains and add more beads, and so on till I have my necklace/string of beads as long as I want it, at this point it is really a garland or string of little beads ready to go on the Christmas tree or across a window or mantle piece. To make it into a loop for a necklace I then I join my chain to the first bead and bind off.
I hope you have a bit of fun with these little things, they are whimsical and always brig a smile to my face, hopefully they will to you too!
Talk soon! I have so much I'd like to share on here, I had forgotten how nice it is to create a record of things I'm making and other stuff, maybe I can show the gorgeous yarns that come into the shop and share patterns and recipes and gardening things too, all the things I'm interested in!
(I promise it won't be another year till I post again! ;)
Monday, November 11, 2019
Mini Heart Bunting - Crochet Fun!


